Start by opening Microsoft Outlook Express.
Step 1
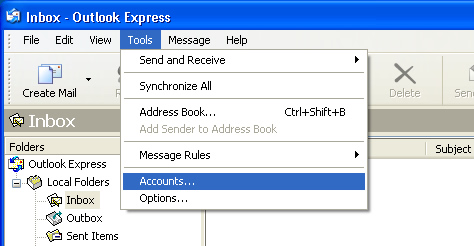
Locate the menu bar in the window. In our screen shot below it reads - File, Edit, View, Tools, Message, and Help.
To open the Accounts configuration wizard, do the following:
- Click the Tools menu
- Then the Accounts option
Step 2
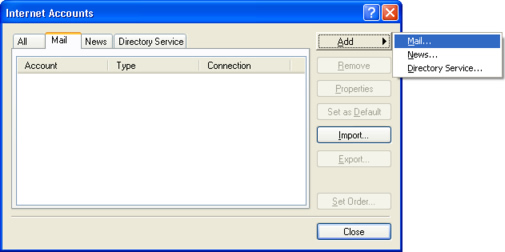
Click "Add" and then click "Mail" to create a new account.
Step 3
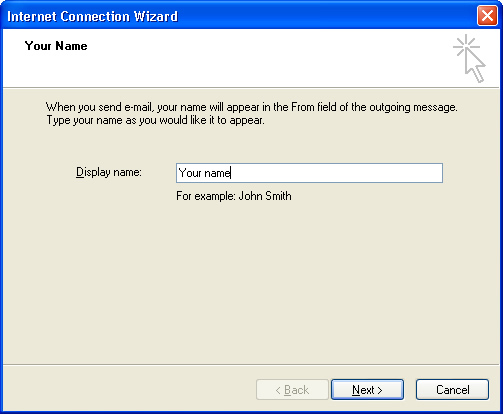
A setup wizard window should now appear which will take us through the rest of the configuration.
The first step is to add your name into the field. This is the name that will appear when people receive an email from you. This should be your full name or company name. Once filled in, click next.
Step 4
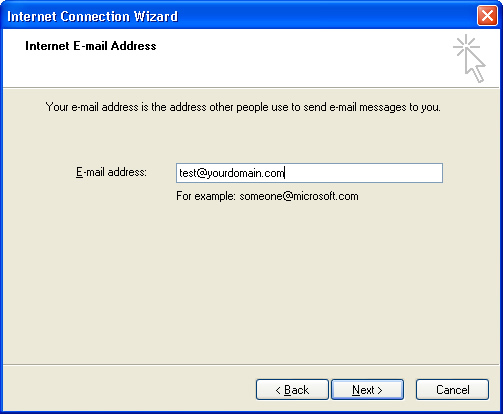
The next screen requires you to enter the email account that you are setting up. This should be the full email address such as info@yourdomain.com (where yourdomain.com should be replaced by the domain of your website). Once filled in, click next.
Step 5
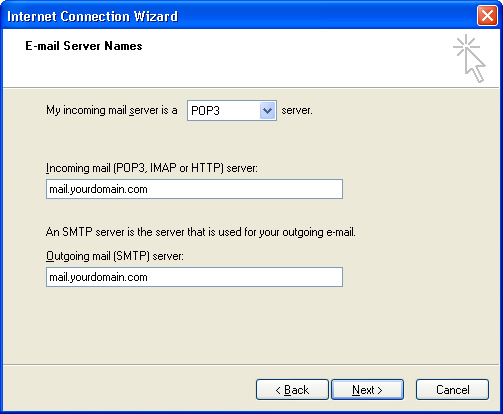
On this next screen we are going to configure the incoming and outgoing mail servers. First of all select POP3 as the incoming mail server. In both of the boxes below we must enter the server address in the format "mail.yourdomain.com" where yourdomain.com should be replaced by the domain of your website. The two fields should be identical. Once completed, click next
Step 6
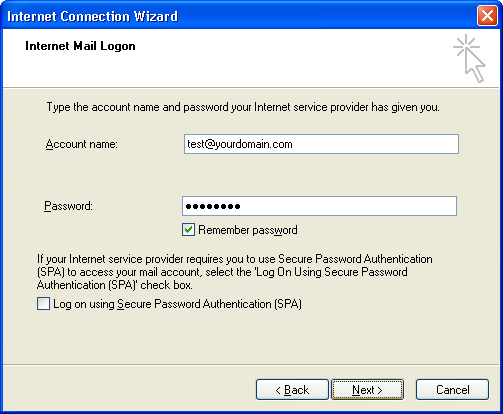
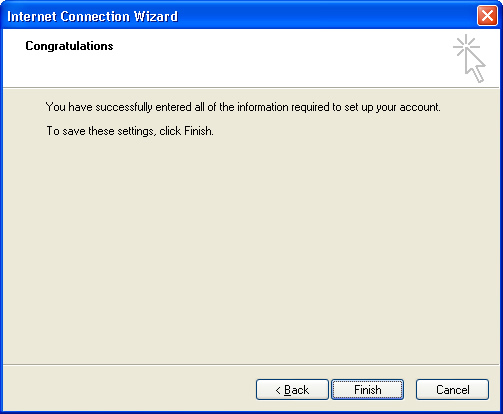
Once the mail servers have been configured, the next screen asks for the username and password of the email account. You should enter the full email address as the username. These details should have been sent to you in a word document. Once complete click next to continue, the next screen confirms that the account has been completed, click Finish
Step 7
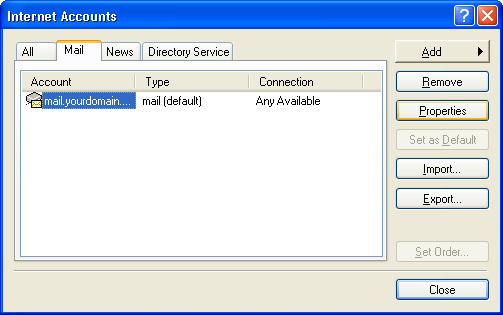
Once the account has been set up, there are a few extra settings that we must configure. In the smaller window that should still be on the screen (see step one to repeat), click to select the newly created account in the mail tab and click on the properties button to the right.
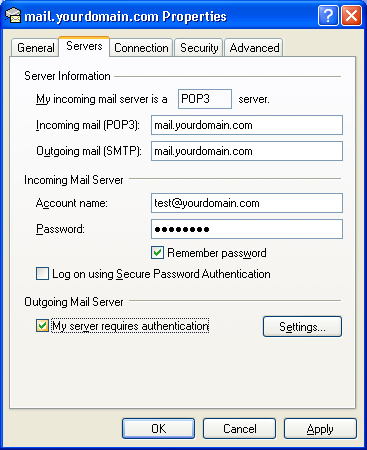
In the window that appears, click on the Servers tab and locate the checkbox at the bottom called "My server requires authentication", tick this box and click apply. If you do not tick this box, you will be able to receive emails but you will not be able to send.
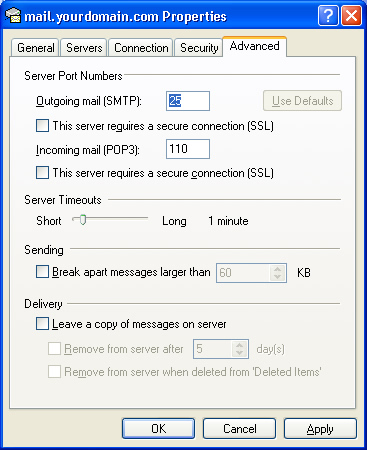
Next, click the Advanced tab and ensure that Port 25 is set for the Outgoing mail server and port 110 is set for the Incoming mail server. The check boxes for SSL should not be set for either. Finally, ensure that "Leave a copy of the messages on server" is not ticked. By doing so you run the risk of filling your inbox on the server and not receiving new emails. Check that the configuration matches the screenshot below and then click OK.
Step 8
Finally, to test and confirm that the email account is correctly configured and working, send an email to the new email account from the same email account (from info@yourdomain.com to info@yourdomain.com). This will test that you can both send and receive. If you receive the email and don't receive any errors then the email account is correctly configured.
Setup Complete
This now concludes setting up your emails on Microsoft Outlook Express.
