To begin please open the Mail program on your Mac
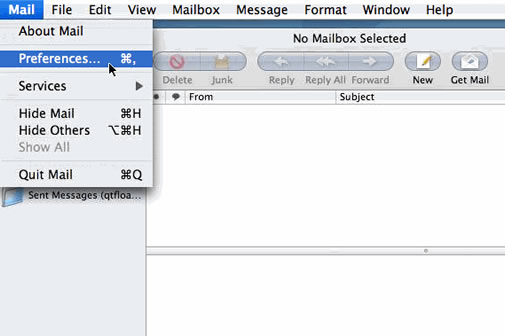
Step 1
In the top menu click Mail and then Preferences
Step 2
A window should then appear showing any existing accounts. In the bottom left hand corner, find the add symbol "+" and click it.
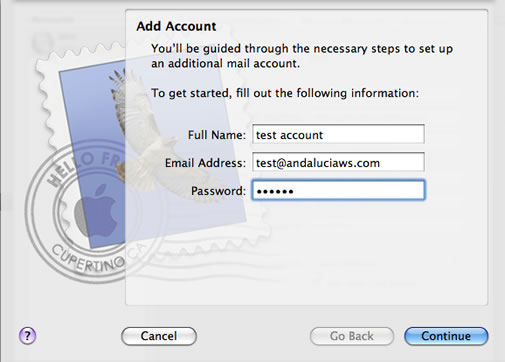
Step 3
In the next window you are asked to fill in the details of the email address. You should fill in your Full Name as should appear when someone receives an email from you. This could also be your company name if you prefer.. Fill in the full email address and password as provided in a word document. Once ccompleted, click Continue.
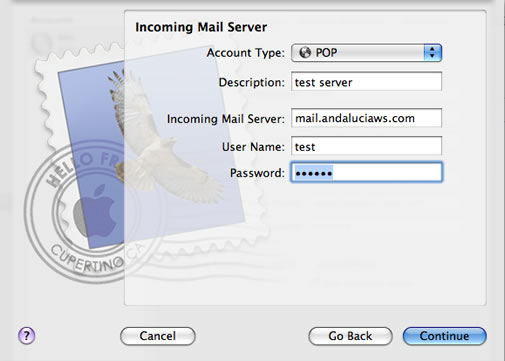
Step 4
In the next screen we need to set up the incoming mail server. First select POP in the Account type field.
In the Incoming Mail Server you should enter the mail server address in the form mail.yourdomain.com where yourdomain.com should be changed to the domain of your website.
In the User Name field you should enter your full email address for example info@yourdomain.com where your domain.com should be changed to the domain of your website.
Then finally enter the password into the field. The username and password will have been provided in a word document.
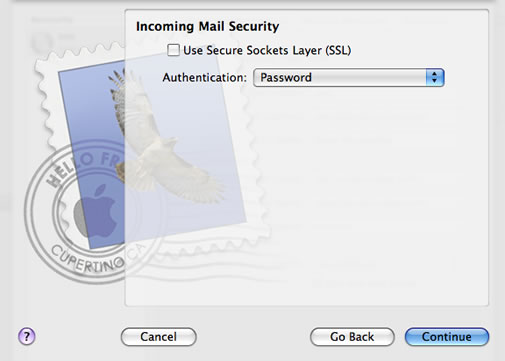
Step 5
In the next screen it asks you to configure the Mail Security. You should make sure that Use Secure Sockets Layer (SSL) is unticked and that Authentication is set to Password.
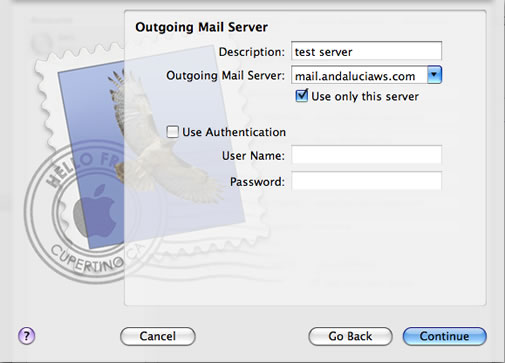
Step 6
Next we proceed to configure the Outgoing Mail Server.
In the Outgoing Mail Server we add the server by selecting mail.yourdomain.com and ticking Use only this server.
Next we must tick Use Authentication and fill in the same username and password as before. Remember that the username should be the full email address. Once completed click Continue.
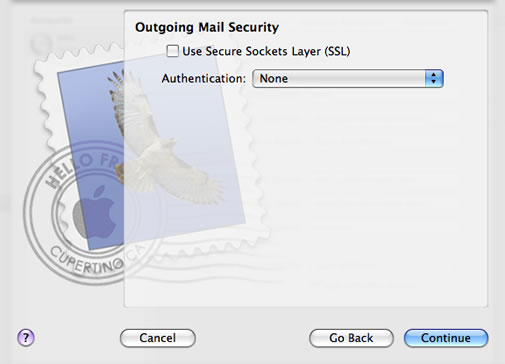
Step 7
As with the Incoming mail server, we must now set the Outgoing Mail security.
Untick Use Secure Sockets Layer (SSL) and select None as the Authentication method and then click Continue.
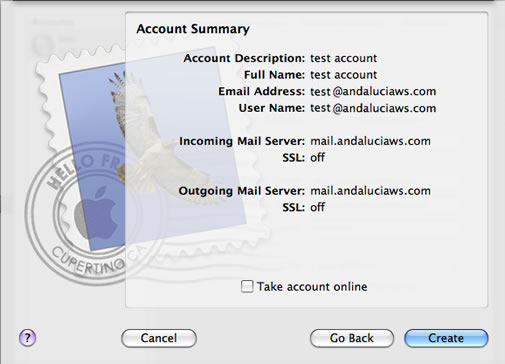
Step 8
Once we have completed the configuration, the next screen shows a summary of the account. Check that your configuration is similar to that below, tick Take account online and then click Create.
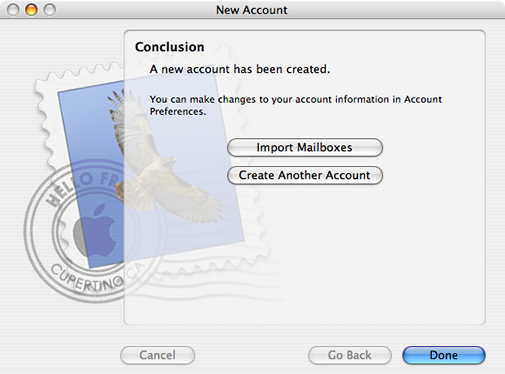
Once created, the next screen shows the screen below. Simply click Done.
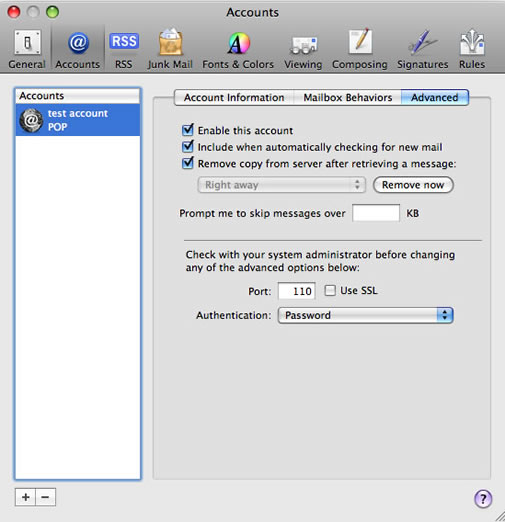
Step 9
Your email account is now set up however there are still a few modifications that we need to make to the configuration. Click to select the new account in the left hand column and the click the Advanced tab in the right hand column.
The configuration you see should be identical to that below. Pay particular attention to the port number making sure it is set to 110 and that the field Remove copy from server after retrieving a message is ticket. This field should be ticket as failure to do so will result in the email account filling up on the server and will also mean that new emails will not be received.
Setup complete
Your email account is now set up. As a final test, you should send an email from the new email account to the same address (from info@yourdomain.com to info@yourdomain.com). This will test both the incoming and outgoing mail configuration. If you receive an email from yourself then everything is correctly configured.